Saturday, 29 February 2020

30 Days to a Food Revolution

30 Days to a Food Revolution

I shared a guest post at The W.H.O.L.E GANG. My post is part of the series 30 Days to a Food Revolution, based on Jamie Oliver’s Food Revolution.

Jamie’s goal is to reach 1 million signatures to take to the President and prompt a change in the quality of the food offered to children in schools throughout America.

I have signed Jamie’s petition and would like to encourage everyone to sign it as well. Over 500.000 people have already signed. Please do your part and help give our children healthier meals and a better future.


source https://www.dinnersanddreams.net/30-days-to-a-food-revolution/

Almond Blackberry Tart

Blackberry season is upon us and I love seeing these black beauties in every corner market. I love the slightly tart taste of blackberries and adore them especially combined with other berries.

The sight is simply gorgeous. Seriously, few fruit arrangements look as pretty as a medley of blackberries, raspberries, blueberries, and strawberries. A perfect topping for any dessert. A splash of color. A ration of health.

Almond Blackberry Tart

Almond tortes/crustless tarts are a more nutritious alternative to cake, easy to make and very versatile. They are unleavened and bake quickly. They are almond heaven for almond lovers.

Almond Blackberry Tart

Almond Blackberry Tart

Almond Blackberry Tart

Gluten-Free Almond Blackberry Tart Recipe

8 servings

Ingredients:

  • 1 cup blackberries
  • 1 ½ cups almond meal
  • 1 tablespoon coconut flour or 2 tablespoons millet flour (or 2 tablespoons all-purpose flour)
  • ¼ teaspoon salt
  • 4 tablespoons (1/2 stick) unsalted butter, softened
  • 1/2 cup honey or agave syrup
  • 3 eggs
  • ½ teaspoon vanilla extract
  • ½ teaspoon almond extract

Directions:

Preheat the oven to 350 degrees Fahrenheit. Spray a 9-inch springform tart pan or individual tartlet pans with cooking spray.

In a large bowl, combine the almond meal with coconut or millet flour and salt. Stir in the butter then stir in the honey or agave syrup, eggs, vanilla extract, and almond extract.

Pour the batter in the prepared pan and scatter the blackberries on top, pressing them lightly in the batter. Bake until lightly browned, 20 to 25 minutes.


source https://www.dinnersanddreams.net/almond-blackberry-tart/

Chocolate Pudding Pie (Gluten-Free)

Chocolate Pudding Pie

After making this pumpkin cake for John’s birthday two years in a row, I figured it was time for a change. Not that he would have minded having it again.

He is pretty loyal to the things he likes and he actually initially requested it but was tempted after I suggested a chocolate pudding pie. Who wouldn’t be swayed by the greatest of all tempters: chocolate!

The crust for this pie is no-bake and made with corn flakes. The filling is a mixture of bananas, chocolate and a hint of butter. Putting the pie together takes about 10 minutes, give or take a few, no more, I promise. Then the pie sets in the refrigerator for several hours, and voilà! C’est tout. That is all.

Chocolate Pudding Pie (Gluten-Free)

Ingredients:

For the cornflake pie crust:

  • 4 cups gluten-free corn flakes
  • 1/4 cup plus 2 tablespoons milk or coconut milk
  • 4 tablespoons (1/2 stick) unsalted butter or coconut oil, melted
  • 1/4 cup semi-sweet chocolate chips, melted

For the filling:

  • 4 medium bananas
  • 3/4 cup semi-sweet chocolate chips, melted
  • 2 tablespoons cocoa powder
  • 2 tablespoons unsalted butter or coconut oil, melted

Directions:

Step 1: To make the crust, grind the corn flakes to a powder in a food processor. In a large bowl, mix the ground corn flakes with milk, butter, and melted chocolate. Spread the crust in an 8-inch springform pie/tart dish by pressing it down with your fingers.

Step 2: Process all of the ingredients for the filling in a food processor until you obtain a smooth and creamy brown mixture. Pour it in the crust.

Step 3: Refrigerate the pie until set, a minimum of 4 to 6 hours.

Enjoy!

Note: You could freeze the pie so it sets faster or if you want to turn it into an ice cream pie.

P.S. I just created a new Facebook page for Dinners & Dreams. Please head over and join. I’d love to see you there.


source https://www.dinnersanddreams.net/chocolate-pudding-pie/

Grilled Salmon with Pomegranate Molasses and Chives

Grilled Salmon with Pomegranate Molasses and Chives

I was pleasantly surprised when I found out the potted chives I bought a few months ago were still alive, and not only alive but strikingly green and vibrant despite having lived in total oblivion in my backyard, under an umbrella where rainwater can’t even reach them.

I call that a small miracle, if not a big one considering the total absence of care and the summer heat. I think they were meant to stay alive just so they would go in this salmon recipe.

I fell in love with pomegranate molasses a while back when I used it in ice cream and fruit salad. I’ve been meaning to try it in a savory dish because I’ve known all along that it would make fish, chicken, and beef taste out of this world.

Fish has especially been on my mind for that experiment but for some reason, I’ve been faithful to my old recipes and have only recently given it a go.

Pomegranate molasses is a perfect match to salmon, bringing much fruitiness and a lovely brown crust that looks and tastes very refined. The chives give just enough savory contrast.

Lessons learned:
1. Chive is a wonderful maintenance-free plant.
2. Salmon plus pomegranate molasses plus chives equals a very happy dinner.

Grilled Salmon with Pomegranate Molasses and Chives

Grilled Salmon with Pomegranate Molasses Recipe

4 servings

Ingredients:

  • 1 pound salmon fillet
  • Sea salt and freshly ground pepper
  • 3 tablespoons pomegranate molasses
  • 2 tablespoons minced chives
  • 1 tablespoon olive oil
  • 1/2 tablespoon lemon juice


Directions:

Step 1: Preheat the grill to medium-high heat.

Step 2: Season the salmon with salt and pepper.

Step 3: Whisk together the pomegranate molasses, chives, olive oil, and lemon juice to obtain a well-combined marinade. Place the salmon in a shallow dish and pour the marinade over it. Turn to coat the other side.

Step 4: Grill the salmon until flaky and browned, 5 to 7 minutes per side.

Step 5: Serve immediately with summer vegetables or a salad.


source https://www.dinnersanddreams.net/grilled-salmon-with-pomegranate-molasses-and-chives/

Yucca Bread Recipe (Gluten-Free)

There is nothing remotely Moroccan about this yucca bread but I just had to share it with you, dear reader. I like to call it my “Brazilian crush”. But I didn’t always know it was Brazilian.

I had it once at a bakery and that’s all it took for me to become enamored with its chewy texture and cheese puff taste somewhat reminiscent of gougères. I googled it, looked up every picture I could find of it until I found a match to what I had eaten.

One thing led to another and I discovered that it is called Pao de Queijo (cheese bread in Portuguese) and found quite a few good recipes of it. This one is adapted from different sources, mainly Simplyrecipes.com.

Yucca Bread Recipe (Gluten-Free)

This bread is delightfully chewy. Perhaps the chewiest you’ll ever eat. It smells wonderful as it’s baking and puffs up like a soufflé when it’s ready, but collapses shortly after.

It is so easy to make. As easy as 1, 2, 3. Literally:
1. Preheat the oven.
2. Blend all the ingredients together in a blender.
3. Bake until golden and puffy.

Yucca Bread Recipe (Gluten-Free)

Yucca Cheese Bread Recipe

Yield: Makes 8

Prep Time: 5 minutes

Cook Time: 20 minutes

Ingredients:

1 1/4 cups tapioca starch/flour
1/2 cup milk
4 tablespoons unsalted butter, melted
3/4 cup shredded mozzarella
1 egg
1 teaspoon salt
1 teaspoon unrefined brown sugar

Directions:

Step 1: Preheat the oven to 400 degrees Fahrenheit. Lightly grease a nonstick muffin tin.

Step 2: Blend all the ingredients in an electric blender until you obtain a smooth, homogeneous batter.

Step 3: Pour the batter into the prepared muffin tin filling each cup about halfway.
Bake until golden and puffy, 20 minutes. Let cool slightly.

Step 4: Eat warm. Reheat leftover bread before eating.


source https://www.dinnersanddreams.net/yucca-bread-recipe/

Monday, 24 February 2020

Le meilleur gâteau au chocolat

Oui, c’est vrai…It is The Best Chocolate Cake!

Many of my holiday gifts this year were for kitchen fun. Pans, small and large muffin tins, whisks, and measuring cups were only a few of the many exhilarating toys I received. This sinfully decadent, immensely rich chocolate cake is from the Chez Panisse dessert cookbook, which I also received as a gift.

I have wanted this book for a long time, and often spent hours browsing through its 350 pages while sitting on the floor at the bookstore, avoiding the dirty looks of the floor keeper who has seen me there too many times, and insinuated with nefarious gazes that it was time for me to either buy or clear the way. I am as thrilled to not have to go there as she is not to see my face again.

I’ve been talking wonders about this cake to everybody I’ve seen or talked to lately. From my friends, Aaron and TJ—who is sadly moving to DC—to my mom in Morocco who gets so excited over the phone when we’re talking about food that I have to turn down the volume setting on the phone while holding it five centimeters away from my ear.

This a chocolate cake that I loved and consider the best chocolate cake I have ever had (after my mom’s, of course). It is the rich and dense kind you’d only enjoy at a Paris or Vienna bakery. Lindsey Shere describes it in her book as the result of combining many French recipes of gâteau au Chocolat.

Le meilleur gâteau au chocolat

The Best Chocolate Cake

6 to 8 servings

Ingredients:

  • 1 cup salted butter
  • 7 ounces semisweet chocolate
  • 2 ounces bittersweet chocolate
  • 6 eggs, at room temperature
  • ¾ cup granulated sugar
  • 3/8 cup brown sugar
  • 3/8 cup cake flour
  • 3 tablespoons ground almonds
  • ½ teaspoon cream of tartar

Directions:

Step 1: Preheat the oven to 375 degrees Fahrenheit. Butter an 8- or 9-inch springform pan. Line the bottom of the pan with parchment paper.

Step 2: Melt the butter in a large saucepan. Add the chocolates, stirring constantly over low heat until melted. Set aside.
Separate the eggs and beat the egg yolks and sugar to combine. While the chocolate is still warm, whisk the egg-sugar mixture into it and stir in the flour and ground almonds.

Step 3: Add the cream of tartar to the egg whites and beat them until creamy and voluminous.

Step 4: Fold the egg whites into the chocolate mixture until there is no more white visible, but without deflating the egg whites. Pour into the prepared pan and bake for 30 to 40 minutes.

Step 5: The cake will crack around the edge but still be a little wiggly in the center. It will continue to cook after you take it out of the oven. Cool completely before unmolding.


source https://www.dinnersanddreams.net/le-meilleur-gateau-au-chocolat/

Gluten-Free Marble Cake

Gluten-Free Marble Cake

Since I made my last coconut flour cake, it’s become a sort of an addiction for me to bake with it. As I mentioned before, coconut flour yields deliciously moist cakes bake faster and are dense enough that you don’t need to use as much of it as you would other flours.

Gluten-Free Marble Cake

I’ve been baking marble cake with it for the past two weeks; a little differently every time until it was simply well balanced. I’ve been enjoying the experimentation.

Combining two amazing flavors like vanilla and chocolate in the same cake is a delicious feat. Think hot fudge sundae, think chocolate chip cookies. Whenever vanilla and chocolate meet in a recipe, two wonderfully opposite worlds play in harmony.

Gluten-Free Marble Cake Recipe

6 to 8 servings

Ingredients:

  • 1 stick unsalted butter, softened
  • 1 cup brown sugar
  • 6 large eggs
  • 2 teaspoons vanilla
  • ¼ cup milk
  • 1 cup coconut flour
  • ½ cup tapioca flour
  • 1 teaspoon baking soda
  • ½ teaspoon baking powder
  • ¼ teaspoon salt
  • 2 tablespoons cocoa powder
  • 1 tablespoon water

Directions:

Step 1: Preheat the oven to 350 degrees Fahrenheit. Grease and flour a 9- to 10-inch Bundt pan.

Step 2: Using an electric mixer, mix the butter, sugar, eggs, vanilla, and milk until well combined. Add the coconut flour, tapioca flour, baking soda, soda powder, and salt. Mix again.

Step 3: Pour half of the batter in a separate bowl. Add the cocoa powder and water and whisk to combine. Pour the batter in the pan alternating spoonfuls of vanilla and chocolate batter. Bake until the cake is set and slightly browned, 30 to 32 minutes. Cool before unmolding.


source https://www.dinnersanddreams.net/gluten-free-marble-cake/

Moroccan Eggplant Jam

I wouldn’t be exaggerating if I said that by posting this recipe I feel like a preserver of culture in my small way. I am excited about that but at the same time baffled at how such a precious delicacy was let slip away. This recipe was enjoyed at the time of my grandparents and great grandparents but no one seems to make it anymore.

Many Moroccans of my generation have never had or heard of it. I feel like I’m bringing back a treasure lost and forgotten in time. Abandoned by most Moroccans, it has however been preserved by the Jewish community in Morocco. It is called confiture d’aubergines in French and murabba braniya in Arabic.

Moroccan Eggplant Jam

At first eggplant and jam didn’t quite click in my head. The two have actually never even met in my thoughts, let alone mingle or get along. I’m used to eating my eggplant either lemony or garlicky. I love my Zaalouk and thought nothing else could compare or measure up to it anyway.

A voice in my head kept urging me to give eggplant jam a chance and I’m so glad I did. I simply loved it. I am now officially in love with it. It’s a true delicacy that suitably tastes of another era. The eggplant is hardly recognizable when it’s cooked and all you get is this very smooth and silky paste that could have been pumpkin, quince or apricot.

If the eggplants are really small, you could keep them whole when making the jam. Enjoy this eggplant jam as a spread on bread or alongside chicken or kebabs. It will provide a nice contrast.

Eggplant Jam Recipe

Yields 1 cup

Ingredients:

  • 1 ¼ pounds eggplant, peeled and cubed
  • ½ cup brown sugar
  • 1 ½ cups water
  • ½ teaspoon ground cinnamon
  • ¼ teaspoon ground ginger

Directions:

Step 1: Place the eggplants in a pot and cover them with water. Cover the pot with a lid and cook over medium heat until the eggplants are very soft about 20 minutes. Drain in a colander.

Step 2: Place the drained eggplants in a saucepan. Add the brown sugar and water. Cover and simmer over medium-low heat until the water is evaporated and the eggplants mushy and dark, 35 to 45 minutes. Stir in the cinnamon and ginger. Let cool.

Step 3: Transfer the jam into a jar, cover, and store in the refrigerator.


source https://www.dinnersanddreams.net/moroccan-eggplant-jam/

Pomegranate Molasses Almond Torte (Gluten-Free)

First of all, if you’ve never had pomegranate molasses, I encourage you to buy some. It is a great ingredient to add to both sweet and savory dishes.

I like having a bottle handy to mix into yogurt, drizzle over ice cream or simply toss into fruit salads. When I’m feeling more inspired, I even use it in marinades or to make ice cream. It adds so much flavor.

Pomegranate molasses can be found in specialty or Middle Eastern food stores for a few dollars. Be sure to buy a good brand, such as this one, made with 100% pomegranates and no added sugar.

See that beautiful color in the torte? That’s the visible sign of pomegranate molasses. The invisible magic is a delightfully tangy and fruity edge and a very moist texture.

Pomegranate Molasses Almond Torte (Gluten-Free)

POMEGRANATE MOLASSES ALMOND TORTE RECIPE

Yield: 8 SERVINGS

Prep Time: 5 MIN

Cook Time: 20 MIN

Ingredients:

  • 1 ½ cups almond meal
  • ¼ teaspoon ground cinnamon
  • 1/8 teaspoon ground nutmeg
  • 4 tablespoons (1/2 stick) unsalted butter, melted and cooled
  • ¼ cup plus 1 tablespoon pomegranate molasses
  • ¼ cup honey
  • 3 eggs
  • 1teaspoon vanilla extract
  • ¼ cup pine nuts

Directions:

Preheat the oven to 350 degrees Fahrenheit. Spray an 8-inch springform non-stick tart pan or individual tartlet pans with cooking spray.

In a large bowl, combine the almond meal with cinnamon and nutmeg. Add the melted butter, honey, pomegranate molasses, eggs, and vanilla extract. Whisk until well combined into a homogenous batter. Pour the batter in the prepared pan and scatter the pine nuts on top. Bake until set, 20 to 25 minutes.


source https://www.dinnersanddreams.net/pomegranate-molasses-almond-torte/

Monday, 17 February 2020

Gingerbread Soufflé

Gingerbread Soufflé

I’ve always dreaded making soufflé. I’ve heard so many horror stories of it not rising and so thought for a long time I should leave it to the top chefs out there. I was wrong; I found soufflé to be easier than cake, literally.

It was quick, straight-forward and fool-proof (I made it twice). It rose beautifully, a little higher than in the picture, and well, I can hardly hide my pride in that. I am just a home cook and I did it, and so can you!

This chocolate gingerbread soufflé will make an exquisite holiday dessert. Ethereal, it will be the lightest, most cloud-like, most delightful dessert to end a rich meal with. It is delicious by itself, but you could fancy it up a bit for the holidays with a warm vanilla or rum sauce on the side.

Don’t you love it when holidays coincide? It puts everybody in a festive mood. Sometimes I wish the whole world had holidays at the same time, exchanged gifts at the same time and had a joyful frame of mind at the same time. I bet it would make God smile. It’s one of those fairy thoughts I can’t help.

Pictures of candles were taken two summers ago in Italy.

Happy Hanukkah and Merry Christmas!

P.S. Take a look at this pictorial holiday calendar. It’s pretty cool watched in fullscreen.

Gingerbread Soufflé

GINGERBREAD SOUFFLE RECIPE

Yield: 4 SERVINGS

Prep Time: 10 min

Cook Time: 12 min

Soufflés collapse after a few minutes of coming out of the oven and therefore are best baked immediately before serving so that you can enjoy their blown up goodness while eating.

Ingredients:

For coating the ramekins

  • 1 tablespoon unsalted butter, melted
  • ¼ cup granulated sugar

For the soufflés

  • 3 ounces good-quality dark chocolate (60 or 70% cocoa)
  • 2 tablespoons unsalted butter
  • 1 tablespoon unsulphured molasses
  • ¼ teaspoon vanilla extract
  • 1 teaspoon ground ginger
  • ½ teaspoon ground cinnamon
  • A pinch of ground clove
  • 3 egg yolks
  • 4 egg whites
  • A pinch of cream of tartar

Directions:

Step 1: Preheat the oven to 375 degrees F.

Step 2: Brush 4 small (3- to 4-ounce) ramekins with melted butter. Coat the buttered ramekins with granulated sugar by rotating the sugar around the bottom and sides. Tap out excess sugar.

Step 3: Place the chocolate, butter, molasses, vanilla, ginger, cinnamon and clove in a large glass bowl. Microwave for 30 seconds. Stir and microwave for another 30 seconds until melted. Stir again to combine.

Step 4: Stir the egg yolks, one at a time, into the chocolate mixture. The chocolate will turn a little thick and sticky.

Step 5: Beat the egg whites with cream of tartar to soft peaks using an electric mixer with a whisk attachment. (Soft peaks means when you lift the whisk, the egg whites are starting to hold themselves but slowly fall back down after a second or two. Stiff peaks are when the egg whites hold themselves straight up without falling.)

Step 6: Fold the egg whites into the chocolate mixture, a little at a time. Keep folding until the mixture is fluffy and has a light brown color but don’t over mix.

Step 7: Divide the mixture among the 4 ramekins, filling them ¾ of the way up. Bake for 12 to 13 minutes until they’re nicely blown up. Do not open the oven during the baking process as that might prevent the soufflés from rising.

Step 8: Serve immediately.

For a quick warm vanilla sauce to serve with the soufflés, simply melt vanilla ice cream until warm in the microwave or on the stovetop. Flavor it with a teaspoon of rum, if you wish. Poke a hole in the soufflé and pour in the desired amount of sauce. Yum!


source https://www.dinnersanddreams.net/gingerbread-souffle/

Quinoa Pudding with Apricots and Pistachios

I made this quinoa pudding last Saturday for breakfast. I am not an oatmeal person and only like very few commercial cereals, but I like quinoa.

It is rich in protein, easy and quick to prepare which makes it an excellent choice for breakfast. I make mine slightly undercooked for an al dente bite.

Use almond or regular milk. Add dried apricots or cranberries. Top with pistachios or almonds. It is yours to customize; a blank canvas for your whims and desires.

Quinoa Pudding with Apricots and Pistachios

Quinoa Pudding with Apricots and Pistachios Recipe

4 servings

Ingredients:

  • 1 cup quinoa, rinsed
  • 2 cinnamon sticks
  • 1 cup of water
  • 3 cups almond milk
  • 1 tablespoon honey
  • 1 teaspoon orange blossom water
  • 2 gum mastic grains, ground (optional)
  • ½ cup chopped dried apricots
  • ¼ cup chopped pistachios

Directions:

Step 1: Place the quinoa and cinnamon stick with the water and almond milk in a medium saucepan and bring to a boil over high heat. Lower the heat to low, cover with a lid and cook for about 12 minutes. Remove from the heat.

Step 2: Stir in the honey, orange blossom water, and gum mastic. Serve topped with the apricots and pistachios.


source https://www.dinnersanddreams.net/quinoa-pudding-with-apricots-and-pistachios/

Mhemmer Recipe

Mhemmer Recipe

My mother is a great behind the scenes contributor to this blog. Countless times I have skyped her with a cooking question and she responded with a long paragraph or even an entire recipe.

I have to admit I have been getting a bit lazy lately preferring to obtain the answer ready from her rather than do my own research. So when I skyped her about Jewish Moroccan recipes, she replied with a handful, including this one.

It’s amazing how mothers try to make our life easier even when we are old enough to do things ourselves. Some of us take advantage of that, ahem. Luckily mothers often don’t mind.

Ever since I was a child I loved omelets with a passion. In fact, the omelet is the very first dish I remember making. I mean, you can’t beat the ease of preparation and versatility of an omelet.

Not to mention that it’s a painless way to get children to eat their vegetables. I often mix a hearty but incognito dose of mashed carrots, green beans or squash into omelets. It’s one of the few ways I can get my daughter to eat her veggies. So, really, thank goodness for omelets.

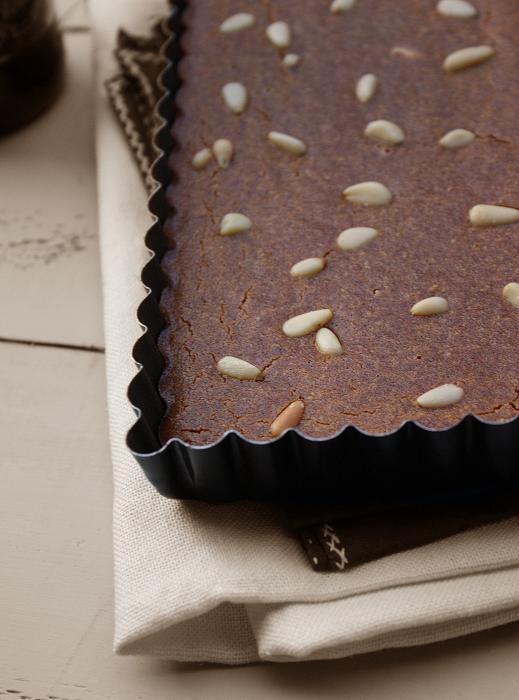
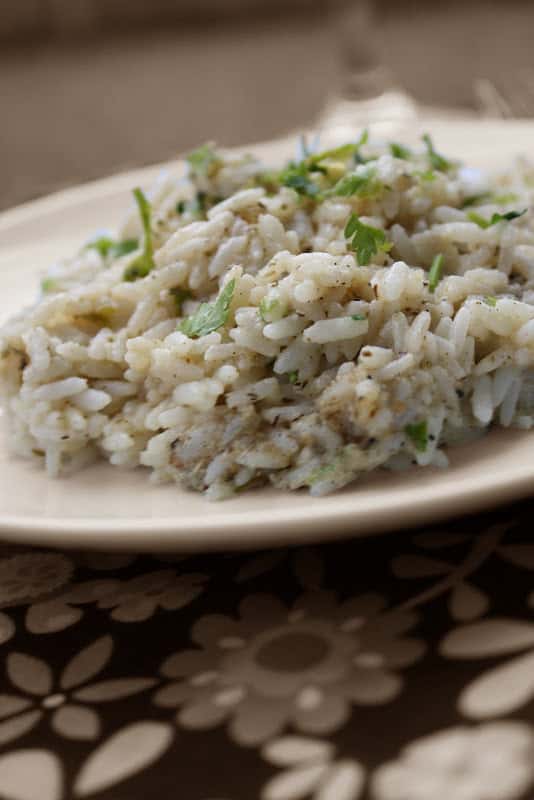
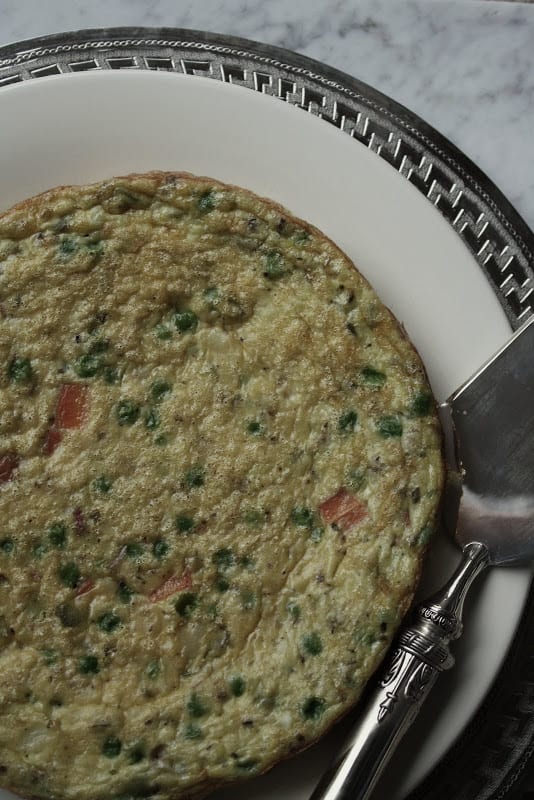
Mhemmer a.k.a Meguina is similar to a frittata or tortilla Espanola. It is a meal in and by itself. Eggs, mashed potatoes, peas, and a few aromatics are combined to produce a very satisfying dish.

It is baked like a cake and even has the density of one because of the mashed potatoes. It’s easy to cut into slices and looks pretty on the plate, its studded peas and carrots peeking out on the sides.

Mhemmer Recipe

Mhemmer/Meguina Recipe

6 to 8 servings

Ingredients:

  • 2 medium potatoes, peeled and quartered
  • 1 cup diced carrots
  • 1 cup peas
  • 2 shallots, minced
  • 2 garlic cloves, pressed
  • 3 tablespoons olive oil
  • 8 large eggs
  • Sea salt (I used ½ teaspoon)
  • Freshly ground pepper (I used ¼ teaspoon)
  • 1 teaspoon chopped parsley (optional)
  • ½ cup shredded gruyère or parmesan (optional)

Directions:

Step 1: Preheat the oven to 350 degrees Fahrenheit. Spray a 9-inch rimmed baking pan with cooking spray.

Step 2: Place the potatoes in a pot of water and cook them over medium-high heat for 10 minutes. Add the carrots and peas. Cook another 10 minutes. Drain in a colander.

Step 3: Meanwhile, sauté the shallots and garlic in olive oil in a small skillet over medium heat, 2 to 3 minutes.

Step 4: Place the potatoes in a large mixing bowl and mash them using a potato ricer or fork. Beat in the eggs vigorously, one at a time. Add the sautéed shallots and garlic, peas, carrots, salt, pepper, parsley, and shredded cheese. Stir well to combine.

Step 5: Pour the egg mixture into the prepared pan. Bake until the omelet is set for 35 minutes. Serve warm or at room temperature.


source https://www.dinnersanddreams.net/mhemmer-recipe/

Strawberry Buckwheat Cookies

Strawberry Buckwheat Cookies

I don’t know about you but I have to think long and hard before baking with buckwheat. It’s not a flour that comes to my mind easily when I’m contemplating making cookies or cake.

I have made buckwheat flatbread and buckwheat crepes, and both times I used another type of flour in combination with buckwheat. In these cookies, I used only buckwheat and mixed it with strawberry jam to soften the taste. Then I topped each cookie with more jam for extra fruitiness.

Enjoy!

Strawberry Buckwheat Cookies

Strawberry Buckwheat Cookies

Serves: Makes 18 cookies

Ingredients:

  • 2 ¼ cups buckwheat flour
  • ¼ teaspoon salt
  • ¼ teaspoon baking powder
  • 2 eggs
  • ½ teaspoon vanilla extract
  • ¼ cup and 1 tablespoon strawberry jam (plus more for filling the cookies)*
  • 3 tablespoons agave syrup or honey
  • ¾ stick unsalted butter, melted

Directions:

Step 1: Preheat the oven to 350 degrees Fahrenheit. Line a cookie sheet with parchment paper.

Step 2: In a mixing bowl combine the buckwheat, salt, and baking powder. Whisk the rest of the ingredients together in a separate bowl and add them to the flour. Stir well to obtain homogeneous cookie dough.

Step 3: Form small balls of dough and place them on the prepared sheet. Dig a small well in the center of each cookie using your finger. Fill each well with ¼ teaspoon jam.

Step 4: Bake for 18 to 20 minutes.

*I used Polaner fruit-juice-sweetened jam


source https://www.dinnersanddreams.net/strawberry-buckwheat-cookies/

Meat and Potato Tagine

Every nation has its version of a meat and potato dish. Every nation has to feed its men and children after all. We all know that our men and children love their comfort food.

We also know that they have more than that in common but we won’t get into that today. We love them just the way they are. Let’s leave it at that.

Tagine of beef or lamb and potatoes is Morocco’s version of a comforting meat and potato dish. Its way to keep its men happy and children well fed. It is a wonderfully satisfying dish to share with family and friends.

There are so many versions of this tagine. Try it and adapt it to your likes. Add preserved lemons, if you wish. Sprinkle it with chopped parsley. Dunk fresh bread in the sauce. Make it yours and you’ll love it all the more.

Meat and Potato Tagine

Beef or Lamb and Potato Tagine

4 servings

Ingredients:

  • 1 medium onion, minced or grated
  • 2 garlic cloves, minced or pressed
  • 1/4 cup olive oil
  • 1 pound stewing beef or lamb, cut into 4 pieces
  • 1 teaspoon chili powder
  • 1 teaspoon ground cumin
  • 1/2 teaspoon ground ginger
  • 1/4 teaspoon turmeric powder
  • Sea salt and freshly ground pepper, to taste
  • 2 1/2 cups water or broth, or more if needed
  • 6 sprigs parsley
  • 2 large potatoes, peeled and quartered lengthwise
  • 1/2 cup olives of choice

Directions:

Step 1: Place the onion, garlic, olive oil, meat, chili powder, cumin, ginger, turmeric, salt and pepper in a medium pot. Sauté the meat over medium heat, turning occasionally, 5 to 7 minutes.

Step 2: Add the water and parsley. Cover with a lid and cook 50-60 minutes. Discard the parsley.

Step 3: Add the potatoes. Cover and cook, 15-20 minutes, or until the potatoes are tender. Add the olives a few minutes before turning off the heat.

Step 4: Serve immediately.

Note: Alternatively, you could assemble all the ingredients in a slow cooker and forget about it.


source https://www.dinnersanddreams.net/meat-and-potato-tagine/

Saturday, 15 February 2020

Chicken Shawarma Sandwich

Chicken Shawarma Sandwich

Shawarma is a lot like a gyro. It is similarly cooked on a vertical spit and thinly shaved into strips. It is popular at fast-food restaurants across the Mediterranean, including Morocco where I have had the most amazing shawarma sandwiches.

I haven’t had shawarma ever since I made it for my book about two years ago. I’m constantly concerned with coming up with new recipes that I forget to revisit old favorites. I have finally made it again. I have almost forgotten how good it is.

This recipe doesn’t require an exorbitant list of ingredients, which is really nice. It requires some planning ahead, though. It needs to marinate and the longer it does, the better it will taste. The sesame tahini is so garlicky and lemony and complements this sandwich so beautifully.

Serve shawarma in a pita or naan pocket topped with tomato and onion slices. Drizzle with loads of tahini sauce and you have yourself an out of this world chicken sandwich.

Shawarma Sandwich Recipe

4 servings

Ingredients:

For the chicken

  • 1 pound boneless skinless chicken breast, cut into thin strips
  • 3 tablespoons distilled white vinegar
  • 3 garlic cloves, minced
  • 1 tablespoon allspice or shawarma spice (I used allspice)
  • 3 tablespoons olive oil
  • Salt and freshly ground pepper
  • 4 whole-grain pita or naan pockets


For the tahini sauce

  • 1/2 cup tahini (sesame paste)
  • 2 cloves garlic, minced or pressed
  • Juice of 2 lemons
  • 4 tablespoons plain yogurt or sour cream
  • Salt and freshly ground pepper

For Garnish

  • 1 tomato, sliced
  • 1 small onion, cut into thin strips

Directions:

In a large bowl, combine the chicken, vinegar, garlic, shawarma spice, olive oil, salt, and pepper. Mix well. Cover and let marinate in the refrigerator for 6 hours, preferably overnight.

Cook the chicken in a medium sauté pan over medium heat, stirring occasionally, 20 to 25 minutes.

Mix all the ingredients for the sauce together in a medium bowl. Serve the chicken in the pita bread pockets, garnished with onion and tomato and drizzled with the tahini sauce.

Note: I personally like to spray my pita or naan with cooking spray and grill it in a panini press to get rid of the cardboard feel it sometimes has. Doing so really makes a difference in the taste and restores elasticity to the bread. You may heat the pita on a skillet instead of a panini press if you wish.


source https://www.dinnersanddreams.net/chicken-shawarma-sandwich/

Baked Oatmeal Recipe

Baked Oatmeal Recipe

In breakfast I trust. In a baked oatmeal breakfast I trust very much. Here is why.

Reason 1: I wake up excited knowing that I’m having it for breakfast. It gets me rushing out of bed and to the kitchen in a flash.

Reason 2: my daughter who would not normally touch oatmeal devoured her serving and asked for more! Behold her how eagerly she gobbled it up.

Reason 3: my husband who has his set, almost unbreakable breakfast preferences abandoned them suddenly for this oatmeal.

Reason 4: it is so delicious it tastes almost like dessert. I’ve been eating it for breakfast as well as in the afternoon.

Only con? Being so popular, it doesn’t last long. I made it twice in a week. My guess is I should start doubling the ingredients to make more of it. More, more, more of it, please.

And finally, I’m happy to say that I’ve made peace with rolled oats. I don’t like them for oatmeal; they are normally too mushy for my taste but when baked in this recipe they keep a nice al dente texture and get a little crunchy on the surface, which I love.

BAKED OATMEAL WITH RASPBERRIES AND APPLES

Yield: 4 SERVINGS

Prep Time: 10 MIN

Cook Time: 30 MIN

If you don’t like coconut, use 1 1/3 cups oats instead of the suggested 1 cup oats and 1/3 cup coconut.

To double the recipe, simply double the ingredients, use a slightly larger pan and bake for the same amount of time.

Ingredients:

  • 1 cup old-fashioned rolled oats
  • 1/3 cup unsweetened shredded coconut
  • 1 teaspoon cinnamon
  • ½ teaspoon baking powder
  • A pinch of salt
  • 1 cup fresh or thawed frozen raspberries
  • 1 medium apple, peeled and chopped into bite-sized pieces
  • 1 cup milk
  • 1/3 cup plus 1 tablespoon maple syrup
  • 1 egg
  • 1 teaspoon vanilla extract
  • ¼ cup sliced almonds, optional

Directions:

Step 1: Preheat the oven to 375 degrees Fahrenheit. Place the baking rack in the middle of the oven. Butter an 8×8 cake pan.

Step 2: In a large bowl, combine the oats, coconut, cinnamon, baking powder, and salt. Toss in the raspberries and chopped apple.

Step 3: In a separate bowl, whisk together the milk, maple syrup, egg and vanilla extract.

Step 4: Add the milk mixture to the oat mixture and lightly fold to moisten the oats. Transfer into the prepared pan. Scatter the sliced almonds on top, if using.

Step 5: Bake until the surface is golden and the oatmeal looks almost as-set-as a cake, 30 minutes. Let it cool a little.

Step 6: Enjoy warm with your favorite breakfast drink.


source https://www.dinnersanddreams.net/baked-oatmeal-recipe/

Wednesday, 12 February 2020

Shepherd’s Salad

I’ve never eaten with a shepherd, but I know if I ever did, he would serve me a lively salad with cucumbers and olives from his orchard, and plenty of sheep’s milk cheese that he made himself. I just know it.

He would be humble and hospitable, and we would candidly eat, talk and laugh as if we had known each other for ages. Our conversation would be as honest as the ingredients in his salad and we would remember both for a very long time.

My dream of eating with a shepherd will come true one day. I’m not sure if it’ll happen in Greece, Turkey, Portugal, Morocco, Syria or Egypt but I know it will happen.

Meanwhile, I have this salad to keep me happy.

Shepherd’s Salad

SHEPHERD’S SALAD RECIPE

Yield: 4 SERVINGS

Total Time: 10 MINUTES

This salad is wonderful with grilled meats. You can easily make it at the last minute but it tastes better if you let it sit for a little while before serving.

Ingredients:

For the salad

  • 1 English or Armenian cucumber, quartered and chopped into 1-inch pieces
  • 1 large tomato, chopped into 1-inch pieces
  • 1/2 small red onion, cut into thin strips
  • 1/2 cup coarsely chopped parsley
  • 1/2 cup pitted black olives
  • 1/4 cup crumbled feta cheese

For the dressing

  • 2 tablespoons olive oil
  • 1 tablespoon white vinegar
  • 1 tablespoon tahini
  • Sea salt and ground black pepper, to taste

Directions:

Step 1: Place all the ingredients for the salad in a large bowl.

Step 2: Whisk all the ingredients for the dressing in a small bowl.

Step 3: Add the dressing to the salad and toss to combine.

Step 4: Serve at room temperature. If the ingredients are cold from refrigeration, let them come to room temperature before serving.


source https://www.dinnersanddreams.net/shepherds-salad/

Mung Bean & Spinach Soup Recipe

My first contact with mung beans was through glass noodles. My mother often used them to stuff chicken or squid when I lived in Morocco. Glass noodles are lovely, light and low calorie but nutritionally very insubstantial. Actual mung beans, however, are a storehouse of nutrients. They’re also light on the tummy and easy to digest.

When mung beans are cooked they open up and become soft and yellow in color. The texture and taste are similar to those of yellow or red lentils. Like any lentil or bean soup recipe, you have to make liberal use of spices to define the dish. This one is seasoned with coriander, cumin, and ginger, and has a bit of a kick thanks to a hint of cayenne pepper.

Mung bean soup is perhaps more suitable for the warmer months than other bean soups are. When combined with Spring or summer edible greens, it has an even fresher feel. I used spinach but I think nettle, collard or mustard greens would all be fantastic in this soup.

Mung Bean & Spinach Soup Recipe

MUNG BEAN SOUP RECIPE

Yield: 4 SERVINGS

Prep Time: 10 MIN

Cook Time: 45 min

Ingredients:

  • 1 large onion
  • 1 large tomato
  • 2 garlic cloves
  • 1 teaspoon ground ginger
  • 2 teaspoons ground coriander
  • 1 1/2 teaspoons ground cumin
  • ¾ teaspoon ground turmeric
  • 1/8 teaspoon ground cayenne pepper
  • Sea salt and ground black pepper, to taste
  • 6.5 cups vegetable broth (or a mix of broth and water)
  • 1 cup green mung beans, preferably pre-soaked
  • 2 cups chopped spinach or other edible greens
  • 3 tablespoons olive oil
  • Juice of 1 lemon

Directions:

Step 1: Process the onion, tomato, and garlic in a food processor until minced. Transfer to a soup pot.

Step 2: Add the ginger, coriander, cumin, turmeric, cayenne, salt, pepper and broth/water. Bring to a boil.

Step 3: Lower the heat to medium-low. Add the mung beans, cover and simmer for 45 to 50 minutes, or until the beans are open and soft, and the soup is thicker.

Step 4: Remove from the heat. Incorporate the spinach, olive oil and lemon juice. Stir and let sit 10 minutes to allow the spinach to wilt and the soup to cool down a bit. Serve the soup by itself or with warm cooked rice or flatbread.

Note: This soup tastes better the next day so be sure to save leftovers.


source https://www.dinnersanddreams.net/mung-bean-spinach-soup-recipe/

Merguez Recipe

Hello all. I hope you’ve enjoyed a fabulous holiday season with loved ones. I hope 2020 brings you much peace and love. Please know it’s forever an honor to share recipes with you in this little space.

At our end, the last couple of weeks were nippy and grey but filled with good food and people. It’s no surprise to you that John’s mom makes the most amazing holiday dinners and that every year we leave her house well-fed, happy and appreciative. This year she went Italian all the way.

There was salad, egg drop soup, gnocchi and a superbly feathery espresso chocolate mousse I can’t stop thinking about. Despite spending most of our time inside, we did get out for a few long walks and a couple of days by the beach.

I have made quite a few recipes in the past several months. I have even photographed some but never had a chance to put them on the blog. I have been eating a vegetarian diet for a few months now (I had my first meatless Thanksgiving this year!) and it feels a bit awkward to post all those meat recipes I have documented in the past which don’t really come with a current story nor are representative of my present taste inclinations.

But I thought some of you might enjoy them and that was good enough of a reason for me to decide to post them. Besides, I still cook meat for my family and having them on the blog will make it handy for me as well. My next three or four posts will be meat dishes I made months ago before I start posting anything more recent.

For those unfamiliar, merguez is spicy North African sausage. This homely version is uncased and not difficult to make at all.

Enjoy!

Merguez Recipe

MERGUEZ RECIPE

Yield: 4 servings

Prep Time: 10 min (plus marinating time)

Cook Time: 10 min

Ingredients:

  • 1 pound ground beef or lamb
  • 1 tablespoon butter, softened
  • 1 tablespoon harissa
  • 4 garlic cloves, minced
  • 1 ½ teaspoon ground cumin
  • ½ teaspoon crushed fennel seeds
  • ¾ teaspoon salt
  • ½ teaspoon ground black pepper

Directions:

Place the ground meat with the butter, harissa, garlic, cumin, crushed fennel seeds, salt and pepper in a glass bowl. Knead well to combine. Cover with plastic wrap and refrigerate for 1 to 2 hours to marinate.

Oil your grill and preheat it to very hot. Shape the meat into sausage shapes. Grill the sausages undisturbed, until marked on the bottom, 4 to 6 minutes. Flip the sausages with tongs and grill the other side for 4 to 6 minutes. Serve right away with a salad.


source https://www.dinnersanddreams.net/merguez-recipe/

Vanilla Melon Butter

Vanilla Melon Butter

Fruit butter is a fall staple as far as I’m concerned. I usually make them with pumpkin or apple but rarely think of them in other seasons despite the variety of fruit available. This time I started a little early. Melon butter turned out fragrant and delicious. It is a great way to make a favorite summer flavor last a little longer.

VANILLA MELON BUTTER RECIPE

Yield: 2 jars

Prep Time: 10 min

Cook Time: 2 h 30 min

Ingredients:

  • 2 large ripe cantaloupes
  • ¼ cups of water
  • 1.5 cups turbinado sugar
  • 1 vanilla bean, split and scraped
  • Juice of 1 lemon

Directions:

Step 1: Cut the melons in half and remove the seeds and strings. Scoop out the flesh in small pieces.

Step 2: Bring the water and sugar to a boil in a large heavy-bottomed saucepan. Add the melon pieces and cook them over high heat for 10 minutes. Transfer to a blender and puree until smooth.

Step 3: Place the pureed melon back in the pot. Add the vanilla bean (seeds and pod) and lemon juice. Bring to a boil again.

Step 4: Reduce the heat and simmer the puree until reduced to a third of its original volume and appears darker and thicker, about 2h30 min.

Step 5: Remove from the heat. Let cool. Transfer into clean jars with a tight-fitting lid.

Step 6: Refrigerate. Consume within 4 weeks.

(If you plan to can the butter, sterilize the jars by placing them on a cookie sheet in a 350-degree oven for 10 minutes prior to filling them.)


source https://www.dinnersanddreams.net/vanilla-melon-butter/

Ras El Hanout

Ras El Hanout

Ras el Hanout or “top of the shop” is a spice mix that is made of the finest spices a spice merchant has. It varies slightly, here and there, from shop to shop and from region to region, but generally consists of the same base ingredients.

A ras el Hanout from a Marrakesh souk in the South of Morocco is sure to be spicier and bolder than one from Tangiers in the North. This one is full of flavor with a mild kick, which makes it sit somewhere in the middle. Ras el Hanout makes any meat, tagine or vegetable stew taste fabulous.

Ras El Hanout

Ras El Hanout

imagine. Imagine yourself in a souk. Imagine the mysterious alleys. The centuries-old remparts. Imagine the filtered light. The earth colors. Imagine the intoxicating smells. Imagine adventure.

Ras El Hanout

Ras El Hanout

Ras el Hanout

Makes about ¼ cup

Ingredients:

  • 1 teaspoon turmeric powder
  • 1 teaspoon ground cumin
  • 1 teaspoon ground cardamom
  • 2 teaspoons ground coriander
  • 1/2 teaspoon paprika powder
  • 1 teaspoon ground nutmeg
  • 2 teaspoons ground ginger
  • 1/2 teaspoon ground cloves
  • 1 teaspoon ground cinnamon
  • 1 teaspoon ground black pepper

Mix all the spices together and store in an airtight plastic bag.


source https://www.dinnersanddreams.net/ras-el-hanout/

Saturday, 8 February 2020

Markat Hzina: Moroccan Salsa

Markat Hzina: Moroccan Salsa

Markat Hzina roughly translates to “sauce of the mourning widow”. At a time when women didn’t work outside the home, becoming widowed often meant being poor.

This salsa earned this name because a widow often had it and other simple vegetarian meals when she could no longer afford meat after the death of her husband.

To this day, meat remains considerably more expensive than vegetables therefore many people are vegetarian by force, vegan even as dairy products are quite expensive as well.

I have a soft spot for meals that are known as a poor man’s dinner. They’re often the simplest and healthiest. Like dukkah and tchoutchouka, markat hzina is a poor person’s main dish but widely consumed as a side dish by the not so poor.

In fact, markat hzina is very similar to tchoutchouka; they’re both made with peppers and tomatoes. Tchoutchouka is made with cooked tomatoes and often eaten warm; markat hzina is made with raw tomatoes and seasoned with a light vinaigrette, a bit like a salsa or cold salad.

Markat hzina is the name given to this salad by Moroccan Jews but it is widely prepared by Muslims as well who simply call it salada felfla bi matecha (pepper and tomato salad).

Markat Hzina Recipe (Moroccan Tomato and Pepper Salsa)

4 to 6 servings

Ingredients:

  • 1 green or red pepper, roasted, peeled, seeded and diced
  • 2 medium tomatoes, peeled and diced
  • 1 garlic clove, minced or pressed
  • 2 tablespoons extra virgin olive oil
  • 1 tablespoon distilled white vinegar or lemon juice
  • 1/2 teaspoon ground cumin
  • sea salt and freshly ground pepper, to taste

Directions:

Step 1: Prepare the vinaigrette by whisking together the olive oil, vinegar or lemon juice, cumin, salt and pepper in a medium mixing bowl. Add the diced peppers, tomatoes and garlic. Toss to combine.

Step 2: Serve cold or at room temperature with bread or chips.


source https://www.dinnersanddreams.net/markat-hzina-moroccan-salsa/

Rice with Duqqah

Rice with Duqqah

The beauty of Duqqah is that there are no set ingredients you have to have to make it. You can prepare it differently every time with whichever spices, seeds, nuts and dried herbs you happen to have.

As I mentioned in a previous Dukkah recipe, it is a humble Egyptian dish traditionally served as a dip with bread. More contemporary uses of Duqqah include using it as a marinade or crust for meats, or seasoning for vegetables. I especially like it in pasta or rice because it instantly transforms it from flavorless to fabulous.

Fun Fact: Duqqa (which I carelessly spell Dukka sometimes) is pronounced Du’a by the Egyptians who say the Arabic letter Qaf like an A.

Rice with Duqqah

Rice with Dukkah Recipe

4 servings

Ingredients:

  • 1 cup long-grain rice
  • 1/2 cup almonds
  • 2 tablespoons sesame seeds
  • 1 tablespoon dried oregano
  • 1 tablespoon dried thyme
  • 1/2 teaspoon cumin
  • 1/2 teaspoon black pepper
  • 1/4 teaspoon cardamom
  • Sea salt, to taste
  • 1/4 cup olive oil
  • Juice of half a lemon
  • 2 medium carrots, finely grated (optional)
  • 2 tablespoons chopped parsley

Directions:

Step 1: Cook the rice according to package instructions.

Step 2: Toast the almonds, sesame seeds, oregano, thyme, cumin, pepper and cardamom in a skillet over medium heat for a few minutes until fragrant. Transfer to a coffee grinder, add the sea salt and grind to a powder. Transfer the ground mixture to a large bowl and whisk the olive oil and lemon juice into it.

Step 3: Add the carrots, if using, parsley and cooked rice. Toss well to flavor the rice with Duqqa.

Step 4: Serve the rice warm alongside grilled beef or chicken.


source https://www.dinnersanddreams.net/rice-with-duqqah/

Thursday, 6 February 2020

Apricot Sorbet with Smoked Paprika

Apricot Sorbet with Smoked Paprika

Me: Hey you!
You: Hi, Nisrine…don’t call me “you”; I have a name!
Me: Of course you do…uh, sorry… it won’t happen again, I promise. By the way, have you seen how gorgeous apricots are right now?
You: Yes, I’ve noticed.
Me: Then what are you waiting for? Go grab you a pound or two while they’re in season.
You: Oh, I can’t eat a whole pound.
Me: It’s for making sorbet, silly. Hurry!!

Apricot Sorbet with Smoked Paprika

Apricot Sorbet with Paprika Recipe

4 small servings

Ingredients:

  • 1 pound (about 7) sweet, ripe apricots, pitted and chopped
  • 1/4 cup water
  • Juice of half a lime
  • 2 tablespoons honey
  • 1/2 teaspoon vanilla extract
  • 1/2 teaspoon smoked Paprika
  • A pinch of cayenne pepper

Directions:

Step 1: Place all of the ingredients in a small saucepan and stew over medium heat until soft, 5 to 7 minutes.

Step 2: Remove from heat and puree in a blender or food processor.

Step 3: Transfer the mixture to an ice cream machine and churn according to the manufacturer’s instructions. Freeze in a lidded container until set.

Step 4: Serve garnished with mint and a sprinkling of paprika if you wish.

*This sorbet would work beautifully with mangoes or peaches as well.

Apricot Sorbet with Smoked Paprika


source https://www.dinnersanddreams.net/apricot-sorbet-with-smoked-paprika/

Butternut Squash, Date and Tahini Dip

Butternut Squash, Date and Tahini Dip

It’s hard to believe that such a deliciously sweet and nutty dip could be so healthy and quick to make. I made it in mere minutes and had the most amazing accompaniment to vegetables and fruits.

It is perfect with apples, strawberries, celery, carrots and all kinds of crudités. It is reminiscent of a caramel dip both in color and sweetness but it’s so much better because it doesn’t have any added sugar and has a lovely sesame taste from the tahini.

I couldn’t get enough of this dip and quite frankly I didn’t dip in it much. It was so good I rather ate it by the spoon; the first half right away and the second one as a snack the next day right out of the fridge when it tasted like a cold pudding.

Butternut Squash, Date and Tahini Dip

Butternut Squash, Date and Tahini Dip

Yields about 1/2 cup

Ingredients:

  • 1/3 cup butternut squash purée (substitute pumpkin)
  • 4 large ripe Medjool dates, pitted
  • 2 tablespoons tahini
  • 1 tablespoon water, or more if needed

Place all of the ingredients in a food processor and process them until smooth and creamy. Serve cold or at room temperature with fruits of vegetables.


source https://www.dinnersanddreams.net/butternut-squash-date-and-tahini-dip/

Moroccan Spiced Yogurt Dip

A homemade dip is the best accompaniment to chips and vegetables. This Moroccan-inspired one, made with yogurt and spiked with cumin, cayenne, cardamom, and coriander, is especially good with fried foods. I particularly like it with fried fish and chicken tenders. It is so easy to make and perfect for entertaining as well as everyday use.

 Moroccan Spiced Yogurt Dip

Moroccan Spiced Yogurt Dip Recipe

Serves: Makes 1 cup

Ingredients:

  • 1 cup plain yogurt (or strained yogurt for a thicker consistency)
  • 1 medium garlic clove, minced or pressed
  • 1/2 teaspoon fresh thyme leaves or finely chopped mint leaves
  • 1/2 teaspoon ground cumin
  • 1/2 teaspoon ground coriander
  • 1/4 teaspoon ground cinnamon
  • 1/8 teaspoon ground cardamom
  • 1/8 teaspoon chili powder
  • A pinch of cayenne pepper
  • Sea salt and freshly ground pepper, to taste

Combine all of the ingredients in a bowl. Stir them well to combine the flavors. Serve alongside meats, vegetables or chips. If you’re adventurous, serve it with fruit


source https://www.dinnersanddreams.net/moroccan-spiced-yogurt-dip/

Super Moist Gingerbread Muffins

When I moved to the US in 2001, I didn’t know what to think of American food. I didn’t know much about it and I liked burgers and banana split but knew there had to be more to it than that.

When the holidays arrived I discovered two desserts that I knew right away I wanted to eat for the rest of my life: pumpkin pie and gingerbread. The day I learned to make them, I felt like the proudest of all Americans.

I’ll leave pumpkin pie for another time, as it deserves a whole post to itself. Gingerbread! Gingerbread, dear reader, took me by storm. Though I come from a land of fine spices I had never had a dessert so rich, so spiced, so aromatic or so moist. While it didn’t taste completely unfamiliar to me and immediately reminded me of its close cousin, pain d’épices, it was simply much better.

My interpretation of gingerbread is particularly rich, perhaps heavier on molasses than usual, which makes it dark and robust. It’s also very moist and perfect in muffin as well as in cake form. I love it with a good cup of coffee or hot cocoa. Gingerbread makes me happy.

My favorite way to eat gingerbread is warm, topped with a dollop of sour cream, crème fraîche or ice cream.

Super Moist Gingerbread Muffins

GINGERBREAD MUFFIN RECIPE

Yield: 12 muffins

Prep Time: 10 MIN

Cook Time: 15 MIN

Ingredients:

  • ½ cup unsulphured dark molasses (preferably not blackstrap)
  • ½ cup sour cream
  • ½ stick (4 tbsp) unsalted butter, melted and cooled
  • 2 eggs
  • ½ cup unrefined brown sugar
  • 2 tablespoons orange or apple juice
  • 1 teaspoon vanilla extract
  • 1 cup whole wheat flour
  • 1 teaspoon baking soda
  • 2 teaspoons ground ginger
  • 1 ½ teaspoon ground cinnamon
  • ¼ teaspoon ground clove
  • ¼ teaspoon ground nutmeg
  • ¼ teaspoon salt

Directions:

Step 1: Preheat the oven to 350 degrees Fahrenheit. Line a 12-muffin muffin pan with paper liners.

Step 2: In the bowl of an electric mixer, beat the molasses with the sour cream, butter, eggs, brown sugar, orange juice, and vanilla extract until well combined.

Step 3: Sift the dry the ingredients (the rest) into the wet ingredients and mix again until you obtain a homogeneous batter.

Step 4: Distribute the batter among the 12 cups. Bake until set, 15 to 18 minutes.


source https://www.dinnersanddreams.net/super-moist-gingerbread-muffins/

Lamb and Carrot Tagine

Lamb and Carrot Tagine

It’s time for a tagine again! As soon as the weather starts cooling off a bit, I feel the need for a comforting, all-in-one-pot tagine—the salad dinners simply don’t cut it anymore and I find myself craving more flavor, more substance.

This particular one is very flavorful and often made by combining carrots with peas, which makes it pure eye candy. Use lamb, veal or beef to make this tagine. I used lamb in mine.

Lamb and Carrot Tagine

Carrot Tagine Recipe

Servings: 3 to 4 servings

Ingredients:

  • 1 pound stew meat
  • 4 medium carrots, sliced lengthwise and cut into bite-sized cubes
  • 1 medium yellow onion, minced
  • 3 garlic cloves, minced
  • Juice of half a lemon
  • ¼ cup olive oil
  • Sea salt and freshly ground pepper
  • 1 teaspoon ground cumin
  • ½ teaspoon ground ginger
  • ¼ teaspoon ground turmeric
  • 1 1/2 cups water

Directions:

Place all of the ingredients in a large mixing bowl. Stir the ingredients to combine the flavors. Transfer the ingredients to the base of a tagine, placing the meat on the bottom and the carrots on top. Sauté the contents of the tagine over medium heat for 5 to 7 minutes. Add water, lower the heat to low and cover with the tagine lid. Cook the stew for about 3 hours, checking occasionally and adding water if necessary.

Alternatively, use a slow cooker.


source https://www.dinnersanddreams.net/lamb-and-carrot-tagine/

Mint Tea

Mint Tea

Mint tea is a staple of Moroccan life. Yes of life, not only consumed as part of a meal, but any time of day, for every occasion-on eids, to toast one’s lover, at the closing of deals, and even at birth ceremonies and funerals.

My father had mint tea all day long, one glass after another, a little bit as a water substitute. I didn’t quite inherit his addiction, but I love a good glass of hot and syrupy mint tea a few times a week while relaxing or reading a book.

This recipe is for an individual serving. In Morocco, hardly anything is individual. Meals, as well as tea, are prepared for common sharing, so tea is prepared in a large quantity, in a teapot using gunpowder tea and large sugar cubes or a generous piece of a colonial sugar cone, which is believed to taste better than granulated sugar.

This is a picture of how tea is served in Morocco. It is prepared in a teapot and presented in an engraved metal tray with small white or colorful glasses with intricate metallic designs.

Moroccan Mint Tea Recipe

1 serving

2 teaspoons sugar
1 green tea bag
3 sprigs fresh mint
1 cup boiling water

Place the sugar, green tea bag, and mint sprigs in a serving cup. Add the boiling water and let infuse, 3 to 4 minutes. Stir to distribute the sugar, discard the tea bag, and enjoy.


source https://www.dinnersanddreams.net/mint-tea/

Wednesday, 5 February 2020

How to Make Moroccan Clarified Butter (Oudi)

Some of you may be familiar with smen, Moroccan aged butter famed for its powerful, tantalizing aroma. Oudi is a milder alternative to smen prepared in the Berber region of Souss in southern Morocco by clarifying butter in toasted barley and local mountain herbs such as dried thyme (the much-beloved azoukenni of the Berber people) or oregano.

According to cookbook author Paula Wolfert, the use of toasted barley grits to clarify butter is “an old Mediterranean trick, employed to absorb milk solids and other debris and endow the butter with a lovely faintly smoky aroma.”

A little touch of oudi brightens any dish, adding a lovely herb aroma and a faint “aged butter” taste to stews, tagines, couscous, soups and baked goods.


How to Make Moroccan Clarified Butter (Oudi)

How to Make Moroccan Clarified Butter (Oudi)

I strained the butter into a bowl for esthetic purposes but using a pitcher is more practical and makes it easier to transfer oudi into jars.

How to Make Moroccan Clarified Butter (Oudi)

MOROCCAN CLARIFIED BUTTER RECIPE

YIELD: MAKES ABOUT 1 1/3 POUNDS

TOTAL TIME: 30 MINUTES

Ingredients:

¼ cup barley grits
1 teaspoon dried thyme or dried Mediterranean oregano
2 ½ pounds unsalted butter, cut into pieces

Directions:

Toast the barley grits and thyme (or oregano) in a heavy saucepan over low heat, stirring constantly, until light brown and fragrant. Add the butter and let it melt undisturbed. Remove the foam as it appears on the surface. When the butter is clear, remove it from the heat and let it cool.

Pour the butter through a strainer lined with a few layers of damp cheesecloth into a pitcher. Discard the solids. Transfer into glass jars.

Closed jars of Oudi will keep for several months in the refrigerator.


source https://www.dinnersanddreams.net/how-to-make-moroccan-clarified-butter-oudi/

Espresso Mascarpone-Stuffed Dates

It all started with a craving for coffee combined with popular demand for a date recipe from both my husband and readers. I closed my eyes ...